Setting Up Your AI Assistant
Your AI assistant handles incoming guest messages automatically — answering common questions, providing check-in instructions, and escalating to your team when needed. This guide walks you through creating and configuring your first bot.
Estimated time: 5 minutes
Before you start
- •You have connected Hostaway and your listings are synced. See Connecting Enhanced Rentals to Hostaway.
- •You have Admin access in your Enhanced Rentals workspace.
Open the Assistants page
In the left sidebar, click Assistants (also referred to as Bots). You will see a list of all configured AI assistants for your workspace.
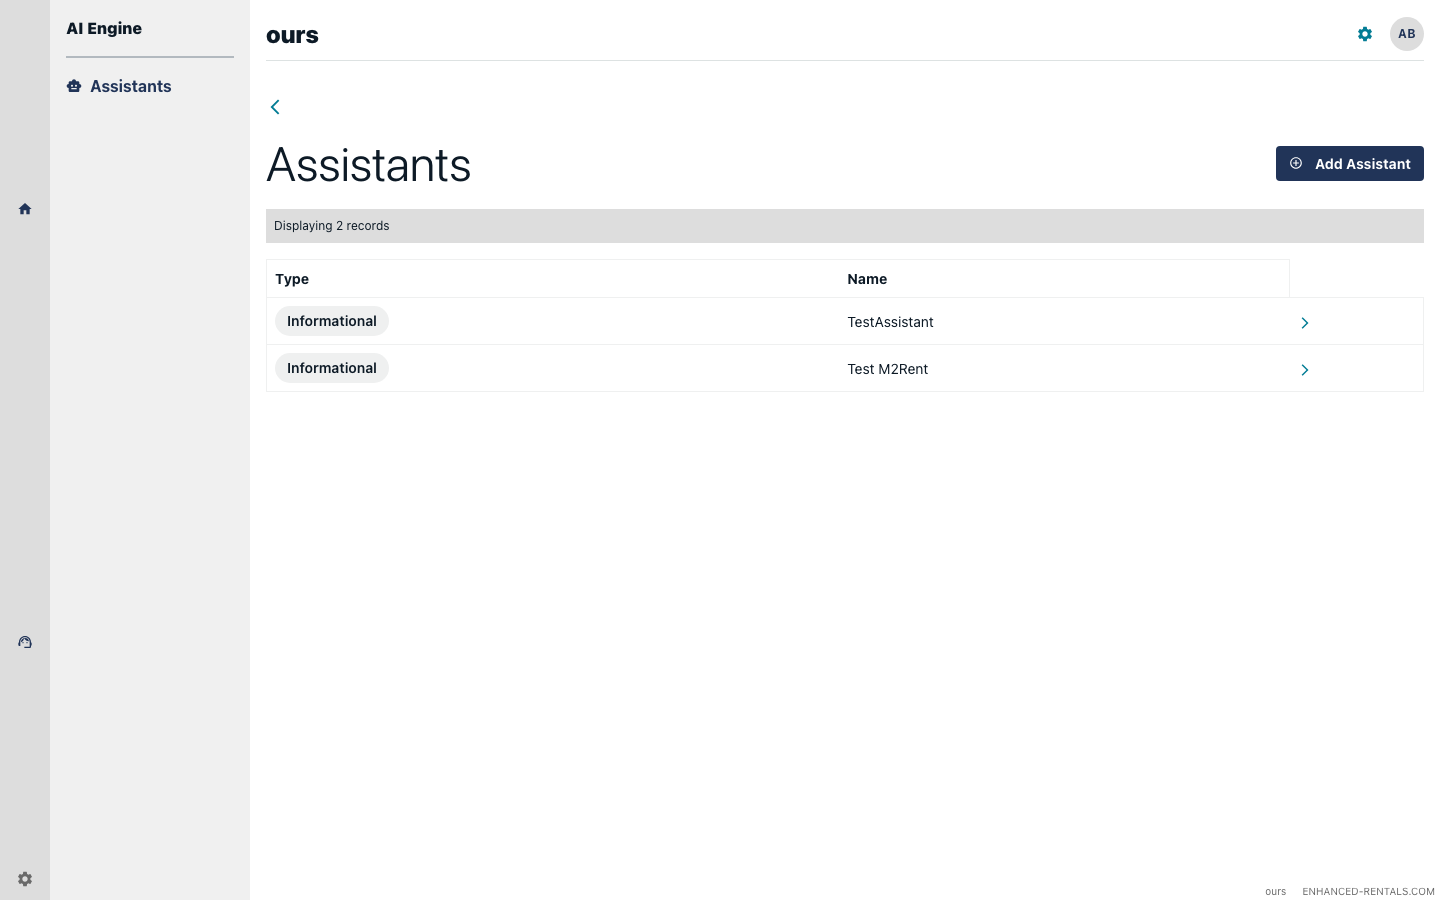
Create a new assistant
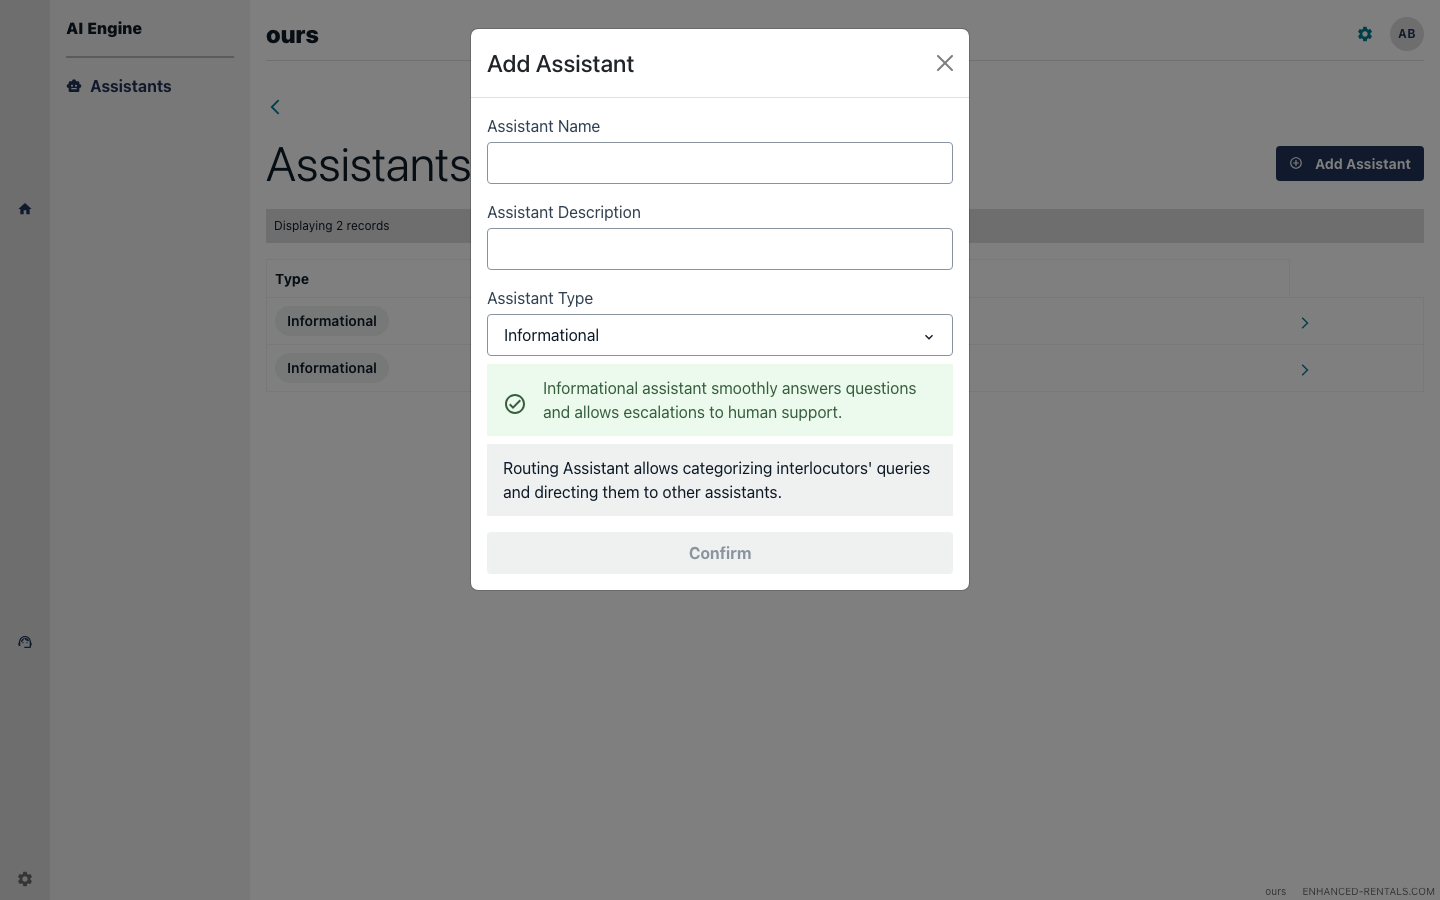
Click Add Assistant in the top-right corner. A dialog will appear asking for a name for the assistant.
Set conditions for when the bot responds
Each assistant has a conditions block — a JSON object that defines which reservations the bot should respond to. When a message arrives, the platform evaluates every assistant in your workspace and uses the first one whose conditions match the reservation.
The most common condition is reservation status. For example:
{ "status": "inquiry" }— only respond to pre-booking enquiries.{ "status": "new" }— only respond to newly confirmed bookings.{ "status": "modified" }— only respond when a reservation has been changed.
Conditions can also be combined — for example, matching on both status and a specific property. Contact support@enhanced-rentals.com if you need help designing the right condition set for your workflow.
"status": "inquiry" for pre-booking questions and a second bot with "status": "new" for post-booking check-in guidance. Each has a different tone and focus.Enable the assistant
Once configured, toggle the assistant to Enabled on its detail page. Disabled assistants are skipped during condition evaluation — useful for pausing a bot without losing its configuration.
If the bot is used on a voice hotline and you want it to be able to transfer callers to a human agent, also enable Allow escalations to human agent. This toggle controls whether the AI can hand off a live call to your team. When it is off, the bot handles all calls itself and will not offer to transfer — useful for bots designed to be fully self-contained (e.g. demo lines or FAQ-only hotlines).
Test the assistant
Send a test message through your Hostaway channel (e.g. Airbnb or Booking.com) for a reservation whose status matches the assistant's conditions. You should see an automated reply appear in the Hostaway conversation shortly after.
Troubleshooting
The bot is not replying to guest messages
Ensure the assistant is enabled and that its conditions match the reservation status of the conversation you are testing with. Also confirm that Hostaway webhooks are registered — go to Settings → Integrations → PMS and check the webhook status for your Hostaway connection.
The bot replies to every message, including staff messages
The bot only replies to messages sent by guests. Internal notes and messages sent by your team in Hostaway are filtered out automatically.
I want to pause the bot temporarily
Open the assistant's detail page and toggle it to Disabled. The bot will stop replying immediately. Re-enable it at any time.